If you are working with Power Query (aka M) and do more than single-line statements, you will frequently find yourself wishing for a powerful editor with proper syntax highlighting. Below I explain how to use Notepad++ for that purpose. While I use Power Query mostly in Power BI, it of course works just as well with other environments.

If you prefer watching over reading, check out the short video below. In it, I use DAX as an example. But it works just the same for M, of course.

First Things First

First Things First

  • This guide is based on the 64-Bit Notepad++ version 8.4.2. You can always download the latest version of Notepad++ here.
  • The same process works with the files for DAX over here.

To the right, you can download the custom language XML files for easy import into Notepad++ and further customization.

Follow the instructions below to

  • enable syntax highlighting
  • enable auto-completion
  • modify the syntax colors to your liking

Get The Files

Subscribe below to get the current version and all future updates for DAX and PowerQuery (M).


    Let's Go

    Extract the received ZIP archive and open the folder location in your file explorer. Make sure there is an “m.xml” file and an “AutoComplete” folder.

    I am aware that the screenshots show DAX, just select M instead. The process remains the same.

    "dax.xml" in the extracted archive folder

    Syntax Highlighting

    To import the file,

    • start Notepad++,
    • click on LanguageDefine your Language, Import,
    • navigate to the file and click Open.
    • Close the Define your Language dialog.
    Click on the image for a larger view
    Click on the image for a larger view

    Make sure to click Language again and select M from the list. Only then it will be applied to the file you opened.

    If you don’t see M in the language menu right away, you may have to restart Notepad++.

    Click on the image for a larger view
    Click on the image for a larger view

    Auto Completion

    This will give you syntax highlighting. If you want to have the auto-complete functionality, you need to

    • navigate to the extracted folder
    • enter the “AutoComplete” folder
    • copy the file “m.xml” from the AutoComplete folder to the folder “autoCompletion” inside the Notepad++ program directory. In my case this is “C:\Program Files\Notepad++\autoCompletion
      • You will get a warning, requiring Administrator permissions.
    • Confirm the warning and restart Notepad++
    Click on the image for a larger view

    Modifying The Colors

    I tried to pick colors that work equally well with the light and dark theme of Notepad++. However, colors that work well for me, might not be that great for you.

    Fortunately, you can adapt them very easily. In Notepad++ click on Language, User Defined Language, Define your Language.

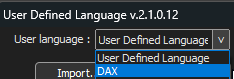
    Select M from the User Language drop-down:

    Click on the image for a larger view
    Click on the image for a larger view

    Use the tabs to find the elements you want to modify:

    • Folder & Default
    • Keywords
    • Comment & Number
    • Operators & Delimiters
    Click on the image for a larger view
    Click on the image for a larger view

    Click on the Styler button and adjust any attributes you want

    • Font
    • Size
    • Bold
    • Italic
    • Underline
    • Foreground color
    • Background color
    pbi_dax_npp_05
    Click on the image for a larger view

    Version History

    Version 4.01 - Sep. 16, 2022

    • Fixed some formatting issues

    Version 4.00 - Jul. 19, 2022

    • Created completely new XML files for syntax highlighting and auto-completion
    • Adjusted formatting to work with dark and light mode
    • Made the syntax highlighting case-insensitive
    • Separated AutoComplete from syntax highlighting to work with the new version of Notepad++

    Leave a Comment

    Your email address will not be published. Required fields are marked *

    This site uses Akismet to reduce spam. Learn how your comment data is processed.